So you’ve got your hands on a gorgeous new Ender 3, and you’re itching to build your first big project with it. You want something that’s big, bold, and beautiful, but you don’t know how to change filament properly on your 3D printer. It’s actually really easy, and once you get the hang of it, it will take you less than two minutes between unloading a print and loading out a fresh spool.
This article is here to help you to do exactly that. Follow the guide to ensure prints come out with a high-quality finish and the extruder is not jammed!
P.S.If you want to change filament mid-print, simply pause the print, do the following steps and resume the printing process.
Here’s how to change filament on your Ender 3 V2/Pro.
- First, preheat the nozzle of your 3D printer to 210°C(for PLA). Alternatively, you can do it on your printer control panel: Prepare/Preheat/PLA(or any other material you’re printing with)
-
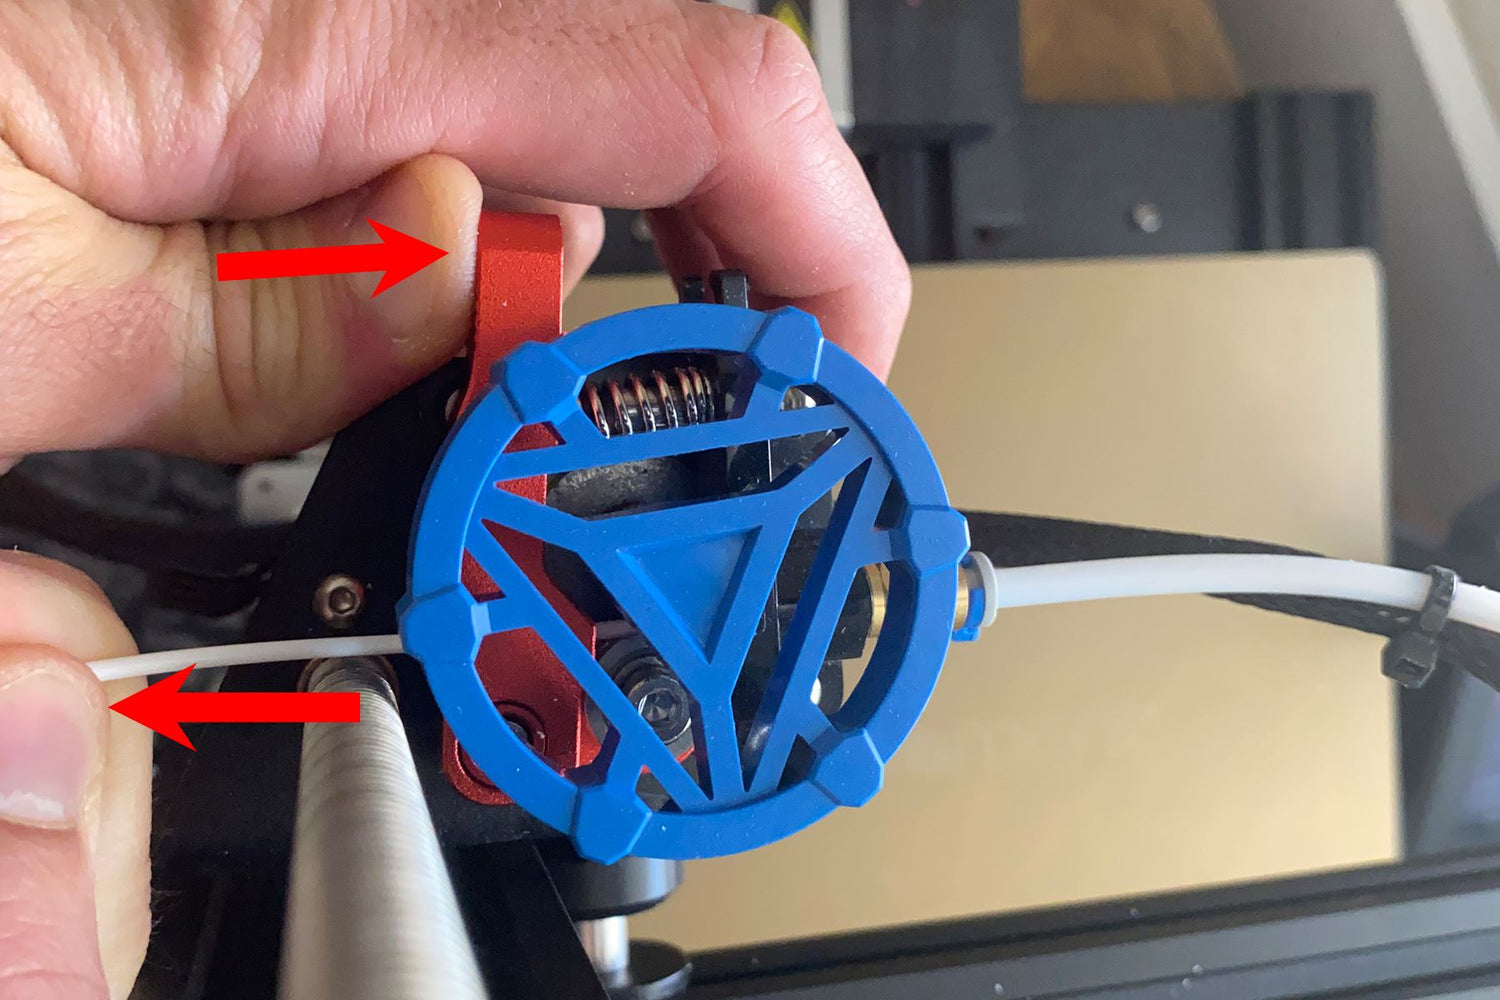
Once this temperature is reached, hold the extrusion clamp down and pull out the filament.

-
Then, cut off the end of the pulled-out filament at an angle.
For high-quality prints, make sure to store your filament in a dry place, like a vacuum bag or a dry box with Reusable Color-Changing Desiccant.

-
Cut the new filament end at a steep angle (45°), so it goes into the extruder easier.

- Squeeze the extrusion clamp and feed the filament in the Bowden tube until it comes down from the extruder.

And there you go! Now you know how to quickly change filament on your Ender 3 within less than 2 minutes! Happy 3D printing!

2 comments
Propilot
For most cases this works perfectly and is the simplest solution. One may have a small amount of colour bleed but it DOES allow for a color change.
For most cases this works perfectly and is the simplest solution. One may have a small amount of colour bleed but it DOES allow for a color change.
larrybud
You forgot to add “if you follow these steps, the colors will be mixed and a contaminated until enough filament goes through to purge the nozzle”.
This is NOT how you do a color change.
You forgot to add “if you follow these steps, the colors will be mixed and a contaminated until enough filament goes through to purge the nozzle”.
This is NOT how you do a color change.